TL;DR
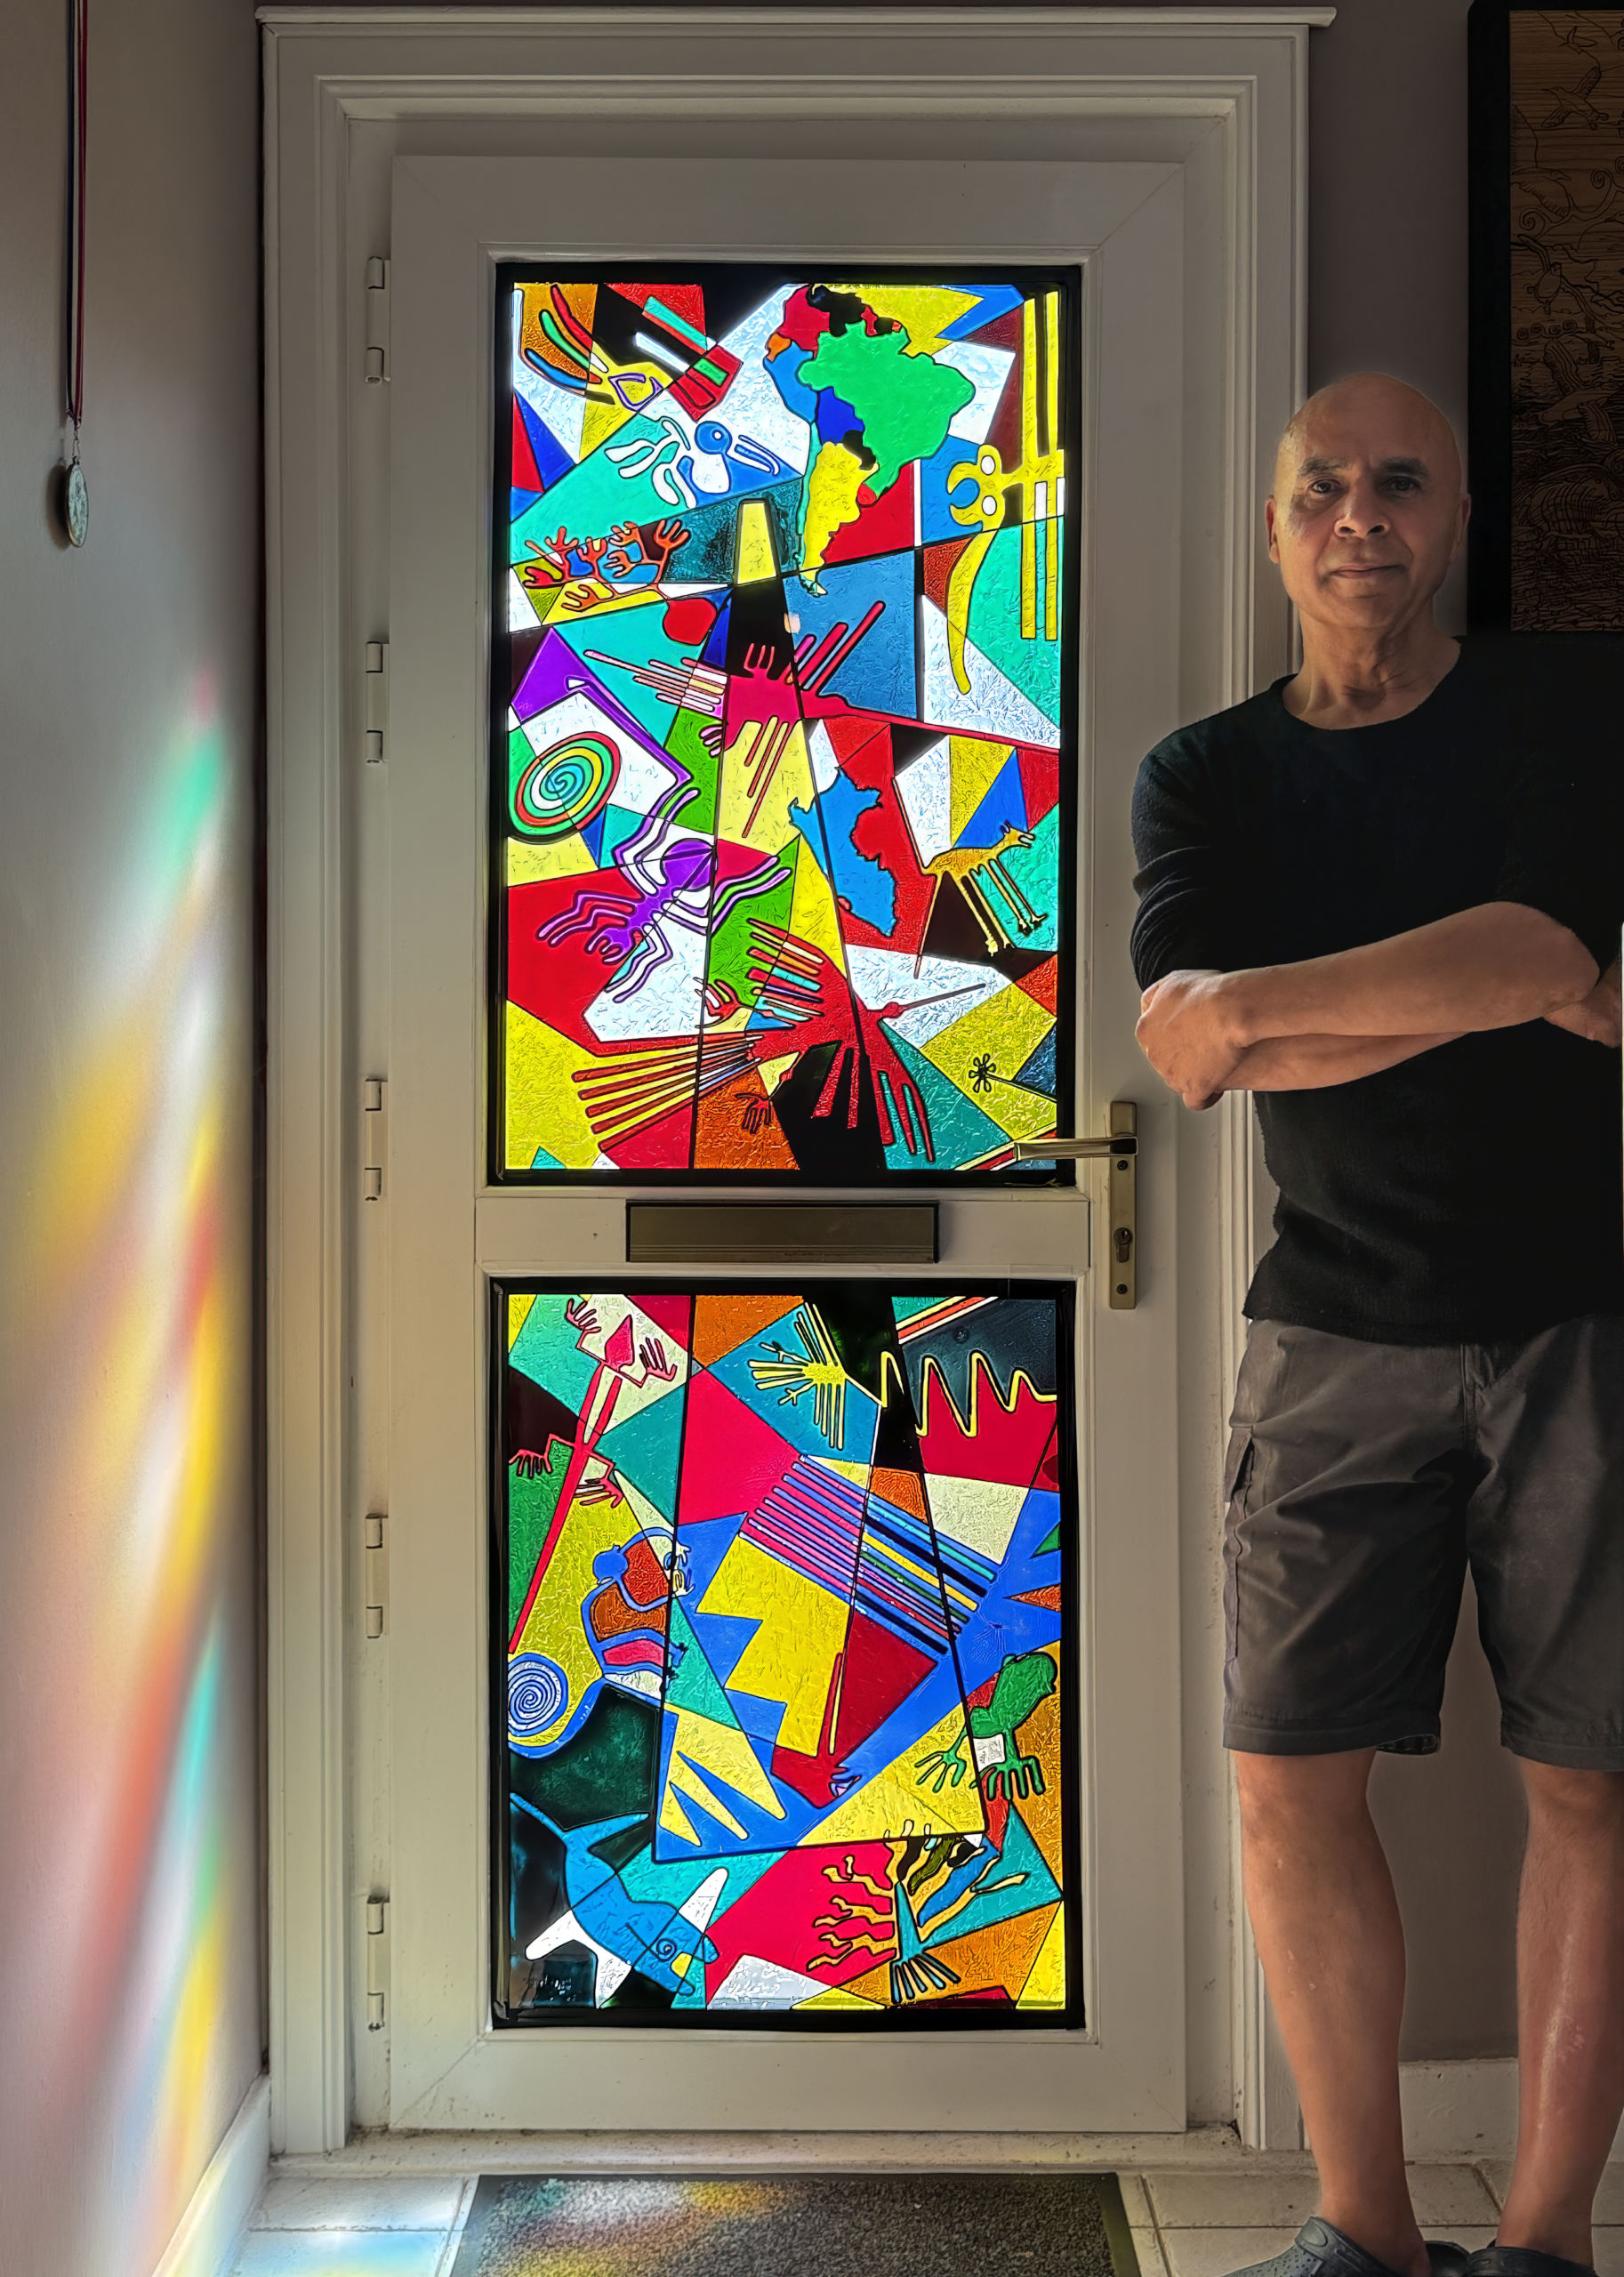
This artwork is my homage to the lines, trapeziums, and animistic geoglyphs of the Nazca desert in Peru – using liquid “stained glass” paints on my pre-cut fretwork design – fixed to a thick sheet of cast clear acrylic – and covered with a glass-smooth layer of non-yellowing clear resin.
Some years back I was lucky enough to tour a lot of Peru and take a plane ride over some of the Nazca lines and geoglyphs. I found them incredibly beautiful, intriguing, mysterious, simple, yet complex. They’re spread over quite a large area (approximately 190 to 385 square miles) of the Nazca desert, and they’ve left a lasting impression on me. For a long time I was quite sceptical about them – thinking they may be fake tourist-bait – apparently only discovered when airplanes started flying over the area… However, I have since learnt a lot more about them – and more have since been discovered and been discovered about them – and I’m now convinced about their age and authenticity.
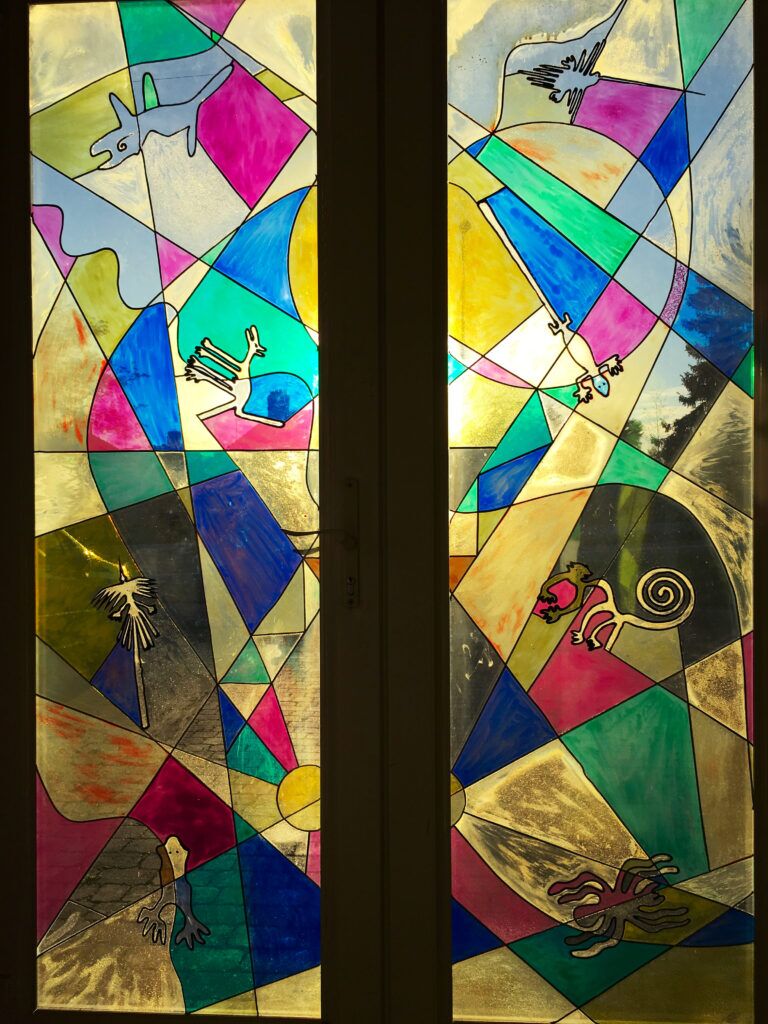
This is in fact my second stained glass artwork about the Nazca lines and geoglyphs. I did my first around about 2001 – for my then new house that I was improving. The house was quite dark so I replaced all the doors and windows with larger double-glazed units. I decided on double front doors to make it easy to get large things in and out (I always have an eye on transporting large artworks). But the double front doors presented a privacy problem because my house faced onto a busy road and there were clear views into the centre of my house! I wanted to have something to let in the light – and thought about mirrored film. I tried some, but it was far too dark. So that gave me the idea of designing a stained glass window…
It was my first attempt at “stained glass”, and I come up with the idea of basing it on the Nazca lines and geoglyphs because I had recently travelled to Peru and made a special excursion to see them. For this artwork I tried to pay homage and condense their essence and aesthetics, and I wanted to express the relationship between the lines, trapeziums, and animistic geoglyphs. Sometimes if you stand too closely to something you can’t see it for what it is – and it helps if someone condenses it and shows you… I used glass paint (I can’t remember the brand) – and adhesive lead-effect strips. I designed it using line (vector) drawing software, printed it out, and used that at my template under the glass. The glass was precisely sized to fit in the frame recess of the double patio doors – so the design had to be split in half vertically (but I took no notice of this in my design).
Some twenty-five years later I revisited “stained glass” making – largely because I saw the huge potential for it with my recent interest in lasers. I got into lasers because I saw lots of creative possibilities using them – for example I could draw things – including very intricate things – and cut them out in various materials extremely precisely – and at any scale. My (new) idea for stained glass was to cut out the black “lead” lines of a stained glass design from a thin sheet of opaque plastic, stick that to a thick sheet of clear acrylic, simply pour coloured glass paint into the what-are-now-recessed shapes, and then cover the whole design with a protective layer of clear resin. Much easier than cutting glass and leading it…? My new design took into account the incredible detail and finesse I could achieve – compared to having to used fixed-width “leading”.


However, the sticking of a laser-cut fretwork design on to a sheet of acrylic proved to be more difficult than expected because, firstly, it’s very tricky to glue such a large, fine and delicate lattice evenly all over (many parts were a millimetre wide and very fragile), and, secondly, it’s difficult to get even pressure on it while the glue dries because the surface of the plastic proved to be not completely flat. The latter I only realised afterwards, was because the cuts in the plastic are not completely flat – the reason being the laser cuts by melting it, and that melting – from a close-up side-on view of the cut – is not completely even (top and bottom) – especially at corners – when the laser slows down approaching them, and speeds-up again moving away.
In practice, this imperfect join of the fretwork to the acrylic sheet meant that liquid glass paint poured into individual cells of the design could leak into adjacent cells – which are usually meant to be a different colour. To fix these mistakes required me waiting for the paint in those cells to dry, clean out all the unintended leakages in adjoining cells, before being able to pour paint in them. Naturally the painting process took much longer than anticipated. Big lesson learnt…!
Leave a comment